前面
之前有看一些英文规范,大概明白一些东西。现在的思路是,由于英文水平较差,首先看中文规范对此规范有了大概的了解之后然后详细研读英文规范,在看中文规范的时候也以英文规范辅助,英文规范是一手资料,中文版难免有所偏差。
每个字都认识,全部连起来就不知道什么意思了。
11.5
先看中文规范,通读一下,明白这个规范主要在讲什么,有哪些内容。
规范中涉及的东西太多,在不了解周边的情况下只看规范太过抽象
参考:


之前有看一些英文规范,大概明白一些东西。现在的思路是,由于英文水平较差,首先看中文规范对此规范有了大概的了解之后然后详细研读英文规范,在看中文规范的时候也以英文规范辅助,英文规范是一手资料,中文版难免有所偏差。
每个字都认识,全部连起来就不知道什么意思了。
11.5
先看中文规范,通读一下,明白这个规范主要在讲什么,有哪些内容。
规范中涉及的东西太多,在不了解周边的情况下只看规范太过抽象
参考:
使用软件:
hmailsever
openssl for window
参考:https://www.cnblogs.com/huyueping/p/7603132.html
参考:https://jingyan.baidu.com/article/6c67b1d6be538c2787bb1e06.html
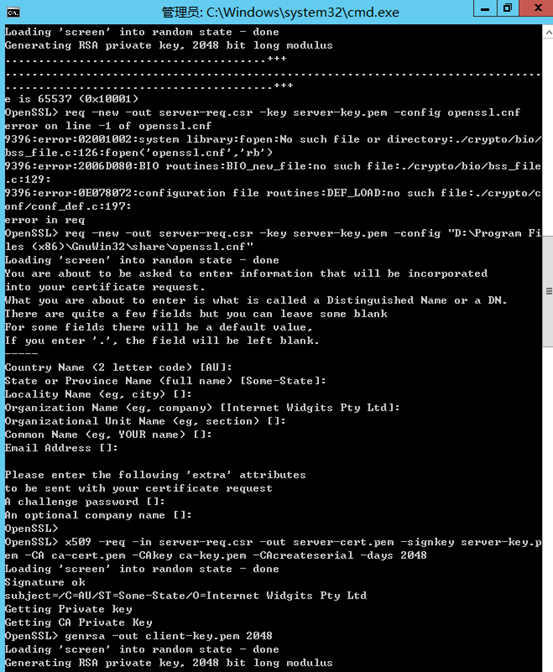
安装openssl for windows
在D:\Program Files (x86)\GnuWin32\bin打开命令行窗口
执行命令:
# openssl
openssl> genrsa -out ca-key.pem 2048
openssl> req -new -out ca-req.csr -key ca-key.pem -config ”D:\Program Files (x86)\GnuWin32\share\openssl.cnf“
openssl> x509 -req -in ca-req.csr -out ca-cert.pem -signkey ca-key.pem -days 2048
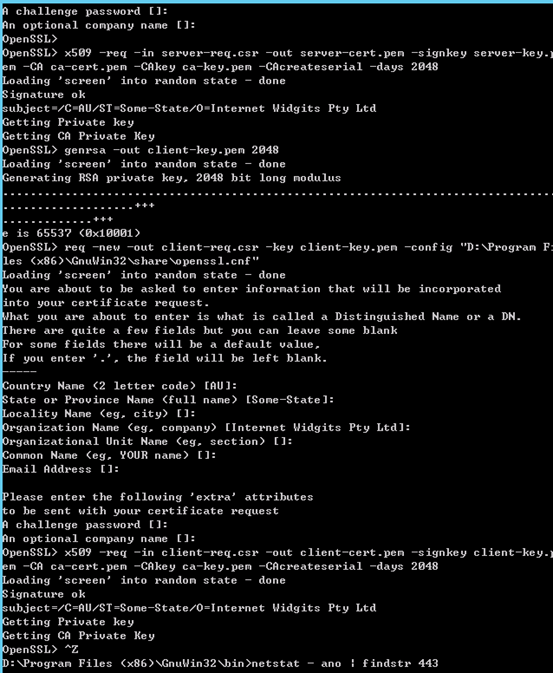
openssl> genrsa -out server-key.pem 2048
openssl> req -new -out server-req.csr -key server-key.pem -config ”D:\Program Files (x86)\GnuWin32\share\openssl.cnf“
openssl> x509 -req -in server-req.csr -out server-cert.pem -signkey server-key.pem -CA ca-cert.pem -CAkey ca-key.pem -CAcreateserial -days 2048
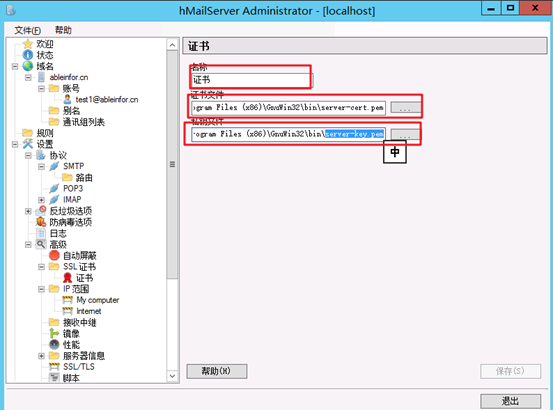
最后生成的
server-cert.pem是证书文件
server-key.pem是私钥文件
参考:http://www.vmos.cn/os/51.html
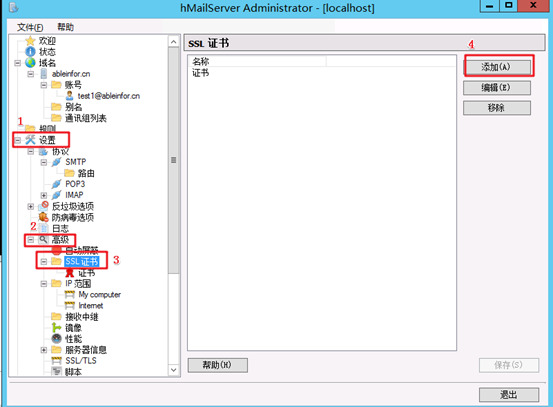
在hmail的
设置--高级--ssl证书--添加
进行添加
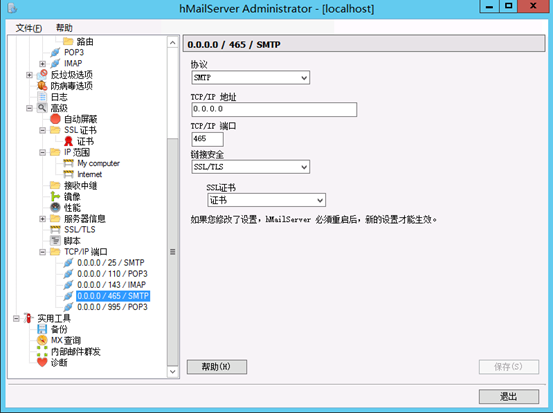
添加smtp的ssl的端口监听
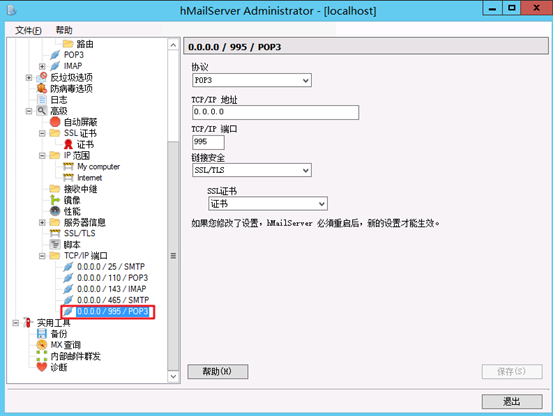
添加pop3的ssl端口监听
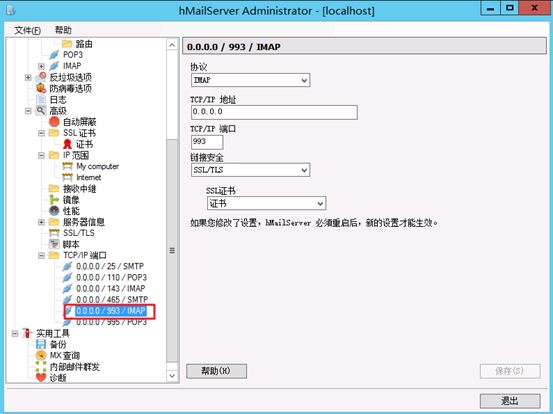
添加imap的ssl的端口监听
PS:
端口对应如下:
协议 用法 纯文本/加密会话 仅限加密会话
POP3 接收邮件 110 995
IMAP 接收邮件 143 993
SMTP 外发邮件 25 465
服从 外发邮件 587
自行测试
首先下载roundcube,地址:https://roundcube.net/download/,选择完整版
解压并重命名文件名为webmail
将webmail文件夹放置到自己的网站的发布路径./www/
打开浏览器访问 http://localhost/webmail/installer (将localhost替换成自己的IP,webmail可以和邮件服务器不在同一个服务器)进行roundcube的配置,配置页面有三步,第一步完成之后会生成一个config.inc.php文件,需要把它放置在./webmail/config/文件夹下面,roundcube支持有很多插件,根据需要进行勾选,我勾选了passwd密码修改插件
在把config.inc.php放好之后到了第三步会对配置和环境进行校验,是红色的就修改一下,mime.types文件需要自己下载和放置到./webmail/config/文件夹下面,并且在config.inc.php文件中添加一行
$config['mime_types'] = '/www/wwwroot/webmail/config/mime.types';
hmailserver的用户密码默认使用SHA256进行加密,将其修改为MD5加密,修改./hmailserver/Bin/hmailserver.ini文件,添加
[Settings]
PreferredHashAlgorithm=2
在./webmail/plungin/password文件夹中 拷贝一份"config.inc.php.dist"更名为"config.inc.php"
在此文件中修改邮箱服务器的数据库连接串
$rcmail_config['password_db_dsn'] = 'mysql://root:yourpassword@localhost/hmailserver';
修改密码更改的sql语句为md5加密
$config['password_query'] = 'UPDATE hm_accounts SET accountpassword=md5(%p),accountpwencryption = 2 WHERE accountaddress=%u LIMIT 1';
修改hmailserver的连接密码
$config['hmailserver_server'] = array(
'Server'   => 'localhost',      // hostname or ip address
'Username' => 'administrator',  // windows username
'Password' => '123456'        // windows user password
);
如果不是邮件服务器本地安装,文件中所有的localhost,都需要修改为邮件服务器的ip
修改完毕
在hmailserver客户端创建用户
打开http://localhost/webmail/登录
参考网站:
http://blog.chinaunix.net/uid-26988130-id-3813713.html
http://www.360doc.com/content/15/0428/12/2459_466541246.shtml
https://blog.csdn.net/cui_com/article/details/52608431